基础知识:
1.SDF 有符号距离场,且通过正负可以判断在物体外部还是内部,通常外正内负
这是RayMarching的灵魂支撑,能够通过一个数学函数,输入一个空间中的点,输出这个点到物体表面的最短距离(带符号)。可以使复杂的几何形状可以通过简单的 SDF运算来组合。比如,两个球体的 SDF 可以通过 min() 操作来融合,通过 max() 来相交,通过 abs()和减法来创造出“镂空”效果。
RayMarching 区别于正常的射线求交,根据他的中文翻译名,光线步进,可以比较生动的理解。
光并非直接打到物体表面求交然后渲染,而是每一步都计算和物体表面的SDF,从而安全前进,循环直道命中物体或者超出最大步数结束。
第一种制作方法:
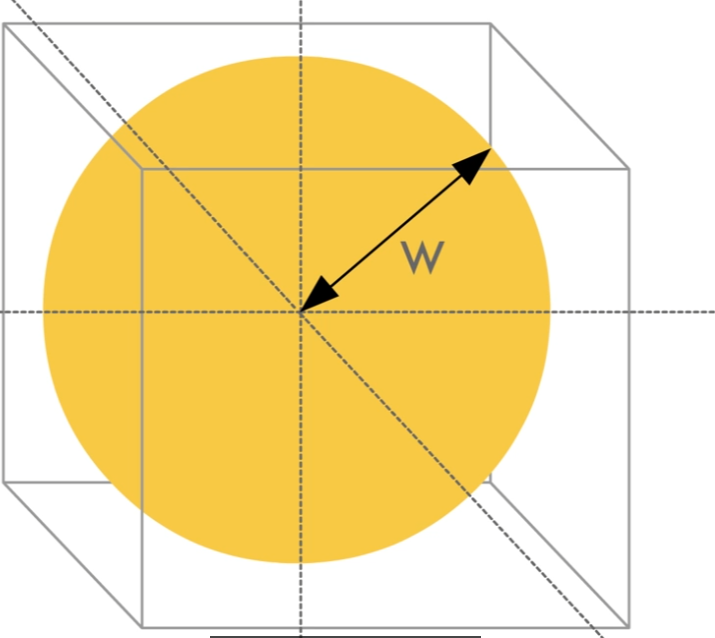
球体采用XYZW四维向量,W表示球体半径
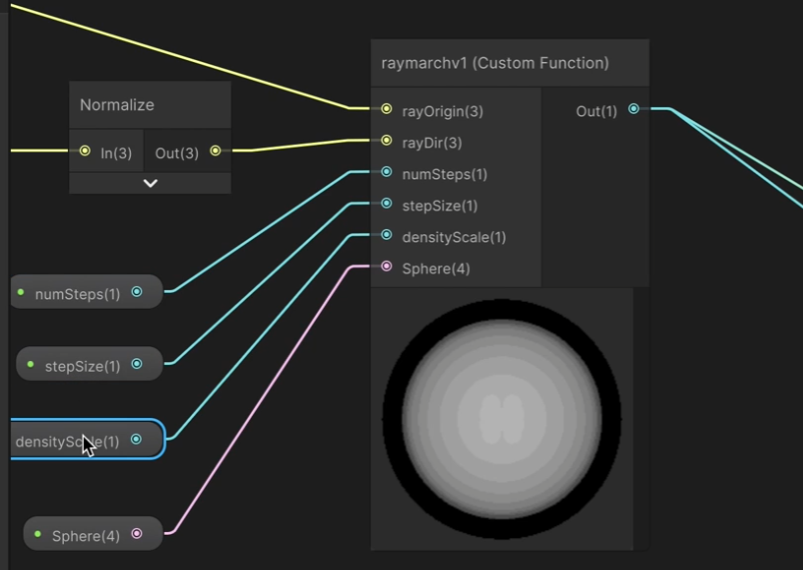
1// 版本1:简单的球体密度测试
2void raymarchv1_float(
3    float3 rayOrigin,        // 光线起点
4    float3 rayDirection,     // 光线方向
5    float numSteps,          // 步进次数
6    float stepSize,          // 步长
7    float densityScale,      // 密度缩放
8    float4 Sphere,           // 球体数据:xyz=中心位置, w=半径
9    out float result         // 输出:累积密度
10)
11{
12    float density = 0;
13
14    // 简单步进循环
15    for (int i = 0; i < numSteps; i++)
16    {
17        // 沿光线方向移动
18        rayOrigin += (rayDirection * stepSize);
19
20        // 计算到球心的距离
21        float sphereDist = distance(rayOrigin, Sphere.xyz);
22
23        // 如果点在球体内,增加密度
24        if (sphereDist < Sphere.w)
25        {
26            density += 0.1; // 固定密度值
27        }
28    }
29
30    // 应用密度缩放
31    result = density * densityScale;
32}
33
在此基础上能输出一个白色的圆环
光线步进-经典的三个参数:
numstep是步数,步数越大,光线越容易走出圆圈的范围,渲染出的效果越淡
stepSize是步长,步长越长,分层越明显, 越小,分层越不明显,越偏向全白
densityScale是密度缩放数值, result = density * densityScale;

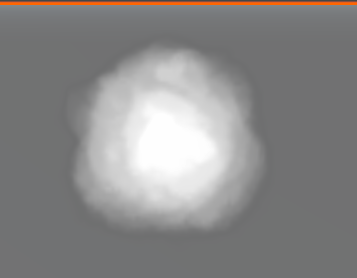
然后把球的节点更换增加一个3D体积纹理就可以变得更像云一些了
1// 版本2:使用3D纹理的基本实现
2void raymarchv2_float(
3    float3 rayOrigin,        // 光线起点
4    float3 rayDirection,     // 光线方向
5    float numSteps,          // 步进次数
6    float stepSize,          // 步长
7    float densityScale,      // 密度缩放
8    UnityTexture3D volumeTex, // 3D体积纹理
9    UnitySamplerState volumeSampler, // 采样器
10    float3 offset,           // 纹理偏移
11    out float result         // 输出:累积密度
12)
13{
14    float density = 0;
15    float transmission = 0;
16
17    // 基本步进循环
18    for (int i = 0; i < numSteps; i++)
19    {
20        // 沿光线方向移动
21        rayOrigin += (rayDirection * stepSize);
22
23        // 从3D纹理采样密度
24        float sampledDensity = SAMPLE_TEXTURE3D(volumeTex, volumeSampler, rayOrigin + offset).r;
25
26        // 累积密度
27        density += sampledDensity;
28    }
29
30    // 应用密度缩放
31    result = density * densityScale;
32}
33
参数还是同理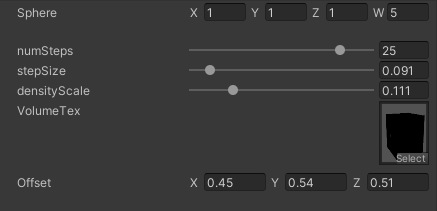
sphere四个参数控制圆心位置和半径
numsteps 确定步数,步长太少根本画不出圆,只有能走过圆的步长才能有形状,step数量确定有没有
step size 确定步长,步长越长数值越大
density scale 确定每一步的值的缩放尺寸
云越多,光线照射到物体上的光线方向数量就越少
最终版本的代码如下
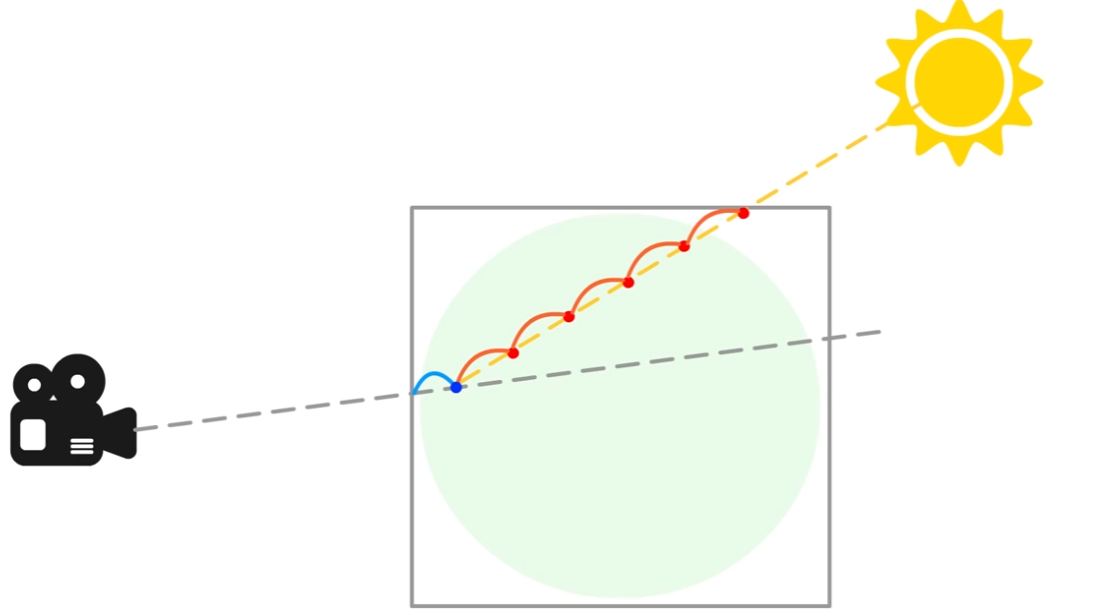
1void raymarch_float(float3 rayOrigin, float3 rayDirection, float numSteps, float stepSize,
2                    float densityScale, UnityTexture3D volumeTex, UnitySamplerState volumeSampler,
3                    float3 offset, float numLightSteps, float lightStepSize, float3 lightDir,
4                    float lightAbsorb, float darknessThreshold, float transmittance, out float3 result)
5{
6    float density = 0;
7    float transmission = 0;
8    float lightAccumulation = 0;
9    float finalLight = 0;
10
11
12    for (int i = 0; i < numSteps; i++)
13    {
14        rayOrigin += (rayDirection * stepSize);
15
16        //The blue dot position
17        float3 samplePos = rayOrigin + offset;
18        float sampledDensity = SAMPLE_TEXTURE3D(volumeTex, volumeSampler, samplePos).r;
19        density += sampledDensity * densityScale;
20
21        //light loop   numLightSteps 数量直接影响性能
22        float3 lightRayOrigin = samplePos;
23
24        for (int j = 0; j < numLightSteps; j++)
25        {
26            //The red dot position
27            lightRayOrigin += -lightDir * lightStepSize;
28            float lightDensity = SAMPLE_TEXTURE3D(volumeTex, volumeSampler, lightRayOrigin).r;
29            //The accumulated density from samplePos to the light - the higher this value the less light reaches samplePos
30            lightAccumulation += lightDensity;
31        }
32
33        //The amount of light received along the ray from param rayOrigin in the direction rayDirection
34        float lightTransmission = exp(-lightAccumulation);
35        //shadow tends to the darkness threshold as lightAccumulation rises
36        float shadow = darknessThreshold + lightTransmission * (1.0 - darknessThreshold);
37        //The final light value is accumulated based on the current density, transmittance value and the calculated shadow value
38        finalLight += density * transmittance * shadow;
39        //Initially a param its value is updated at each step by lightAbsorb, this sets the light lost by scattering
40        transmittance *= exp(-density * lightAbsorb);
41    }
42
43    transmission = exp(-density);
44
45    result = float3(finalLight, transmission, transmittance);
46}
47
《[Unity Shader Base] RayMarching in Cloud Rendering》 是转载文章,点击查看原文。
